Showing posts with label DIY Playtime. Show all posts

Wednesday, April 10, 2013

Homeschool Preschool: Butterflies


Little O just turned two last month, and I've started some homeschool projects with her. Nothing really organized or overly adventurous. I just want to help foster her natural curiosity and desire to learn about everything around her.

We did some winter playdough, winter painting, and Valentine's Day playdough cookies earlier this year.

Since Spring is in the air, I thought it would be fun to do a unit about this season. Then I was inspired by Shaunna over at Fantastic Fun and Learning to focus on butterflies during the next week.


Literacy:
We started the week off by browsing our bookshelf and the library for butterfly-themed books. We read these books all throughout the week.

Books We Read:
The Very Hungry Caterpillar by Eric Carle
Butterfly Colors and Counting by Jerry Pallotta and Shennen Bersani
Caterpillar Spring and Butterfly Summer by Susan Hood and Claudine Gevry
Goodnight, Sweet Butterflies: A Color Dreamland by Dawn Bentley

Math:
Little O is starting to learn to count. Her favorite number is two. And she usually counts by touch each object and repeating two, two, two. It's pretty cute. I kind of like that she's learning the concept of counting individual objects rather than just memorizing the order of the numbers. It makes me feel like the concept is there. Maybe it's just me. :)

I know there are other areas of math for toddlers besides counting. Sometimes I have a hard time coming up with what they are. However, with butterflies, it was easy. Symmetry. Butterflies are the same on both sides.

So, I created this Color Matching Butterfly Printable to help Little O learn about symmetry. I cut each butterfly in half, and her job was to match each side to its mate. I added the letters for use at a later time. I think she's still a bit too young for letter recognition.


I also found these fun Butterfly Matching Cards from PreKinders. For Little O, we just matched a few of the butterflies to their twin. Down the road, we'll add more or even play a Memory Game with them.

Art:
We took the idea of symmetry to our artwork this week. We made these Butterfly Blotter Prints.


And, because Little O loves to craft, we had to add in just one more craft project! We took scraps of tissue paper (leftovers from random Christmas and birthday gifts throughout the years) and glued them to a picture of a butterfly. This project helped Little O work her fine motor skills, using her pincer grasp to pick up each piece of tissue paper. And she got to use glue for the first time. Fun!


Outside:
The obvious choice here would be to go on a butterfly hunt outside. However, it's still a bit cold for butterflies in our neck of the woods. I thought about planting seeds for a butterfly garden (and I still might), but I didn't think Little O would make the connections since it would take too long for the butterflies to actually show up.

So instead, we put on some costume wings that I found at the Dollar Tree, and pretended to be butterflies flying around our backyard. Woohoo! Gross motor skills!


We didn't get a chance to take a field trip up to the Peggy Notebaert Nature Museum to check out the Judy Istock Butterfly Haven. We're definitely going there in the next few weeks. (I had no idea it was there, and we get in FREE with our Children's Museum pass). I wish we could have made it there this week, but it just didn't work out.

I hope you enjoyed our butterfly activities! I love comments, so please tell me what you think and what you're doing with your little one.

Butterfly Color Matching Printable


Little O has been fascinated with colors lately. She likes to name the color of everything she sees. "Blue shirt." "Black car." "Green grass." And on and on.

Keeping her interests in mind, I created this Butterfly Color Matching Printable to go with a homeschool preschool unit on butterflies. It's perfect since Spring is making its appearance known around here.

I printed the butterflies out on white card stock and cut out each square. Then I followed the dotted line to cut each butterfly in half. She's a little young for letter recognition, but I plan on using these butterflies in the future when she's ready (and of course adding other letters as well). For now, the goal is for Little O to match each side of the butterfly with its mate.


While we played, we worked on naming each color. I included the colors she knows (red, orange, blue, black, and purple) and a few she doesn't. I also added a variation on blue and purple (aqua and lavender). I thought it would be nice for her to see different shades within the same color family.

During play, I set out three halves at a time. I asked her to name each color. Then, I held up one of the matches, and she placed it with its mate. She did great matching the colors. The most difficult part of the game turned out to be figuring out how to place each card to make it look like a butterfly. This became especially challenging if I switched which side I placed on the floor in the first place.


I hope you and your little one enjoy this activity.

I absolutely love comments, so I'd love to hear from you about how you used this printable!

Monday, April 1, 2013

Easter Sensory Bin

Little O really loves sensory bins. We made one for Easter last week. I dyed rice in four different colors. It's really easy to dye your own rice or noodles for sensory play. I found directions over at Play, Create, Explore.

After making the rice, I added plastic Easter eggs (two different sizes) and some plastic serving spoons. I got both the eggs and the spoons at the Dollar Tree.

Little O just loved playing with this sensory bin. She scooped the rice with spoons and filled some of the eggs. We closed the eggs and shook them to hear the rice rattle around.

Because this is a messy sensory bin (the rice has a tendency to exit the bin) I placed a sheet under the bin. It caught most of the rice, and when she was done playing I just used the sheet to pour the rice back into the bin for later.

I know it's over, but this colored rice could be used for so much more than just Easter. I hope everyone had a nice Easter. We sure did!

Easter

We had a really nice, low-key Easter here. The day before... not so much.

On Saturday we went to our town's Easter egg hunt. We've never been before. It was a madhouse. Never again. A friend described it as Hunger Games Preschool Training Camp. Picture 200 under 2-year-olds running amok trying to gather as many plastic eggs as possible. And the candy inside: Jolly Ranchers. Yes. My 2-year-old just loves to choke on those. Little O found about 4 or 5 eggs, but some of the younger toddlers didn't get any. I'm pretty sure that 4-foot-tall kid isn't 2. Oh well. Live and learn.

 At least she looked cute, right? It was pretty chilly and windy, so she had to wear long sleeves and tights under her Easter dress. This is one of two dresses she had for Easter. Her Nana and Yaya each bought her one.
You really can't tell from our pictures how crowded it was. This is after the hunt was over, and everyone was leaving the field.

Saturday night we dyed eggs with Little O. She enjoyed placing the eggs gently dropping the eggs into the dye and watching it splash all over herself and the kitchen counter. She did not enjoy waiting 5 minutes to see the eggs when they were finished.


On Sunday Nana and Yaya came over for Easter brunch. We had fresh fruit, mimosas, and Monte Cristo Waffle-wiches. Yum-O.

After brunch we went outside for our own Easter egg hunt. Here's where things got a bit dicey for a moment. At this point Little O has had two egg hunts this year: one at school and the one we went to on Saturday. Both used plastic eggs filled with candy. We used our dyed eggs. They also contain something inside. A hard-boiled egg! Little O was a little disappointed when she discovered our eggs didn't open and there wasn't candy inside. Because she's two, things could have gone downhill quickly from here. But luckily, they didn't. She decided that collecting the eggs in her little basket was a lot of fun. And she enjoyed wandering around the yard finding where the Easter Bunny hid them all.


The week leading up to Easter, we read a bunch of books from the library about the Easter Bunny and egg hunts. And the teachers at school did some Easter crafts. I also created an Easter sensory bin, which Little O loved.


I wanted to make some really cute felt Easter bunnies. I started them, but they will remain unfinished until next year.


I hope you all had a great Easter weekend with your families. I'd love to hear how your egg hunts and Easter crafts turned out. Anyone else have unfinished Easter projects that will just have to wait until next year?

Friday, February 1, 2013

Valentine's Day Playdough Cookies


I wanted another opportunity to play with the white winter playdough again. We've already made snowmen with it, and Little O has played with it independently at her desk. I decided to pull out the same accessories we used for the snowmen and add some circle and heart-shaped cookie cutters. Little O couldn't get the hang of rolling the playdough flat, but she enjoyed mushing it with her hands and ripping it apart. Great work to develop those fine motor skills!

Once I rolled my dough flat, she was interested in helping push the cookie cutters into it. I cut out two circles and two hearts for each of us to play with. I wound up with one heart and one circle, and she got the rest.

I made sure she could reach the decorating supplies: buttons, sequins, heart-shaped sequins, bows, and googly eyes. Then I started decorating mine.

She got the idea pretty quickly. She really liked the small, multicolored sequins. She grabbed handfuls at a time and sprinkled them onto her cookies.

She also enjoyed taking the supplies out of the box and putting them in a pile. I had to let go of my OCD tendencies for this. It is Ok that she mixed the sequins and the googly eyes. It's is.

In the end, this is what we wound up with. They are not beautiful, Pinterest-perfect playdough cookies. But they are perfect to Little O and to me. Process. Not product.

Happy Crafting!

Thursday, January 31, 2013

Winter Themed Painting


Little O loved painting snowmen so much the other day that she asked to paint immediately after breakfast this morning. I didn't want to do the exact same painting that we did before because I want to keep it fresh and new for her. Plus, if we do different things with paint, it will keep her occupied for longer.

This time we used blue construction paper and white and blue tempera paint. I didn't water it down at all because I wanted the paint to be opaque.

 While we painted, we talked about winter, snow, and snowmen. I reminded her of the snowmen we painted and the ones we made out of playdough.
 I painted a snowman next to her, and I told her that I made the body using circles. She said he needed eyes (one of her newest words is "eyes"), so I painted on eyes, a nose, and a mouth with blue paint. I added buttons and arms too.
 
Finally, I wanted her to try a different technique with her paintbrush. She spent most of her time brushing on the paint in smooth strokes. I told her I wanted my picture to look like it was snowing. So I started dotting paint on the background. She started doing the same ( her dots are large in the upper left corner). She decided to liked to brush the paint on better, so she went back to that. Hey, at least she tried it, right?

This was a quick, fun painting activity. Little O seemed to really enjoy it. I'm sure we will be busting out the paints again soon. I think this may be the first time we've painted together on colored paper.

Wednesday, January 30, 2013

Painting Over Crayons & Markers

Little O is still feeling a bit under the weather, so I've been scrambling to come up with ideas to keep her quietly engaged. We've already explored playdough, although I think I'll pull that out again later this week as she really enjoyed it. Yesterday I thought a simple coloring activity would be a good thing to try during the witching hour (you know... after nap but before dinner time).

We started with simple printable snowman that I found on Pinterest. I added the letter S and the word Snowman on the page. She wanted to use both crayons and markers. She had Daddy add the eyes to hers. Normally, we don't draw on her paper because we want her to feel empowered to create her own work. However, eyes is one of her newest words, so when she said it, of course we indulged her.

She finished with the crayons and markers rather quickly (I didn't even get any pictures of this portion), but she wasn't quite ready to be done with crafting. I thought it was the perfect opportunity to reintroduce paint to Little O. I couldn't wait to see what she thought of the reactions the crayons and markers had with the paint. We used blue and green tempera paint that I watered down quite a bit. I wanted the crayon and marker to still show.

The crayons created a crayon resist (I'm not sure she really noticed), but the markers started to bleed and smear because they are washable. She definitely noticed this.
After she finished painting her picture, she painted Mommy's and Daddy's as well. She enjoyed painting so much that she asked to do it again today right after breakfast. I'll share the Winter Themed Painting tomorrow.

Monday, January 28, 2013

Winter Playdough Fun

Yesterday, Little O woke up with the beginnings of a cold. Ugh. Pete and I decided we better play it safe and stay home so we didn't spread it to all our friends. We needed something to do that would keep Little O quiet and happy. Playdough, of course!!


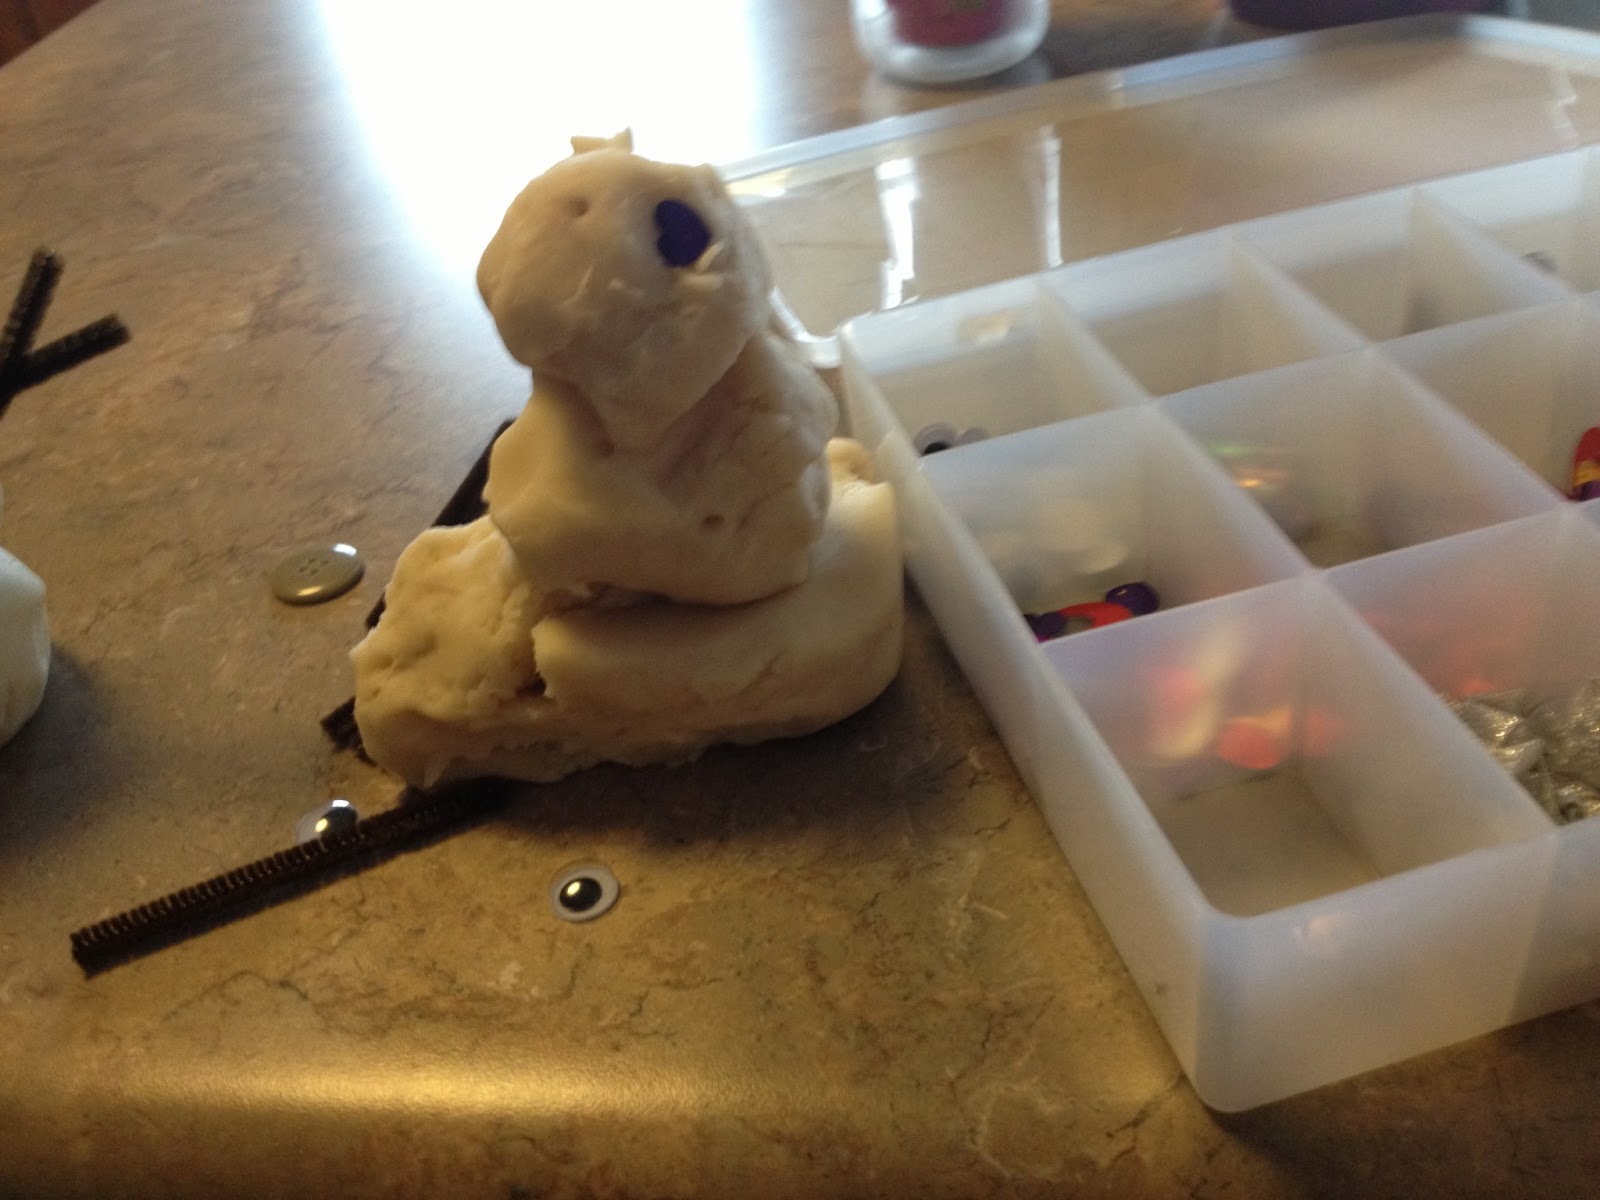
I whipped up a batch of our favorite no-cook playdough. I decided to keep it white this time since we're playing with all things winter right now (winter sensory bin, snow man counting, snowflake sorting, etc.). So with our white playdough, we decided to make snowmen. I had a whole bunch of accessories to decorate our snowmen up in my craft room. Buttons, sequins, fabric strips, pipe cleaners, beads, jingle bells, googly eyes, and mini bows. I brought them down and introduced them to Little O.


I made a traditional snowman (with a bow because I wanted her to be a girl), Pete made a snowmonster.


Little O made her own version. She used googly eyes at first, but switched them out for buttons later. She also used some brown pipe cleaners and skewered her snowman. They sort of look like arms!


 After a while, we started talking about all the animals that live in the snow. Little O is obsessed with anything animal lately (well, always, really). So I made a polar bear. She said and signed bear. And Pete made a penguin.

We had so much fun as a family with this activity. I've kept all the accessories downstairs so we can create more snow animals with white playdough this week. I'm also thinking we should make pretend sugar cookies and decorate them with sequins and glitter. Check out some of our other winter-themed activities here.

Thursday, January 24, 2013

Art Party Activities for Toddlers

Little O is going to be 2 in less than a month! WHAT??? Where did the time go? I feel just a few months ago I was planning her 1st Very Hungry Caterpillar birthday party. I can't believe that was a whole year ago.

I showed you the invitations I made for this year's art party last week. I've finalized my plans for the arts and craft projects for the toddlers attending the party, and I created signs for each station.


The plan is to open up all three stations at the same time and let the kids move freely from one to the next at their own pace. Each activity can be child directed with parental support for those who need it.


At the drawing center, I am planning to cover the whole table with white butcher paper and tape it down underneath. Little O has a hard time keeping the paper still when she's coloring, so I thought this would be the best solution, plus, it would keep the table clean. For drawing supplies, I'm providing crayons and markers in assorted colors, stamps and a variety of stamp pads, and stickers.

I'm really excited about the sculpting table. I'm making homemade playdough (since some of Little O's friends still like to experiment by tasting things). This is my favorite no cook playdough recipe from The Imagination Tree. I like to add the color to the water before adding it to the dry ingredients. I found this keeps my hands clean. In addition to the playdough, I'll provide a selection of cookie cutters, rolling pins, and other playdough toys. For an extra element, I'm planning to add pipe cleaners and feathers so the kids can make some interesting creatures.

The last table is the painting table. I was going to make homemade paint, but I haven't found a recipe that I love yet. So I opted for washable tempera paint. I found some really awesome bottles that have glitter mixed in. And of course I'll have the basic primary and secondary colors as well.

Earlier this week, I went shopping for some of the supplies for the stations. I was really excited when I discovered cute little smocks (just the right size for toddlers) at the Dollar Tree. I had been planning to make smocks for each child as the party favor, but there was no way I could make them for $1. So I went ahead and picked up 12. We may not have all 12 kids attend the party, but I'll keep the extras for play dates at our house. While the invitations did say to wear "art clothes," I'm sure most of the parents will be happy to have a little smock for their kiddos to wear.

I'm getting really excited about Little O's art party. She's going to love it!

Friday, November 23, 2012

Felt Christmas Tree

Earlier this week I found a really cute felt Christmas tree on Pinterest. And I knew I just HAD to make it for Little O. I thought it would be a great way to allow Olivia to play with ornaments and leave our real tree alone. Speaking of which, we put up our real tree today!

I went to Hobby Lobby and bought everything I needed to make Little O her very own felt tree. I bought green felt off the bolt, and several colors of felt squares from the crafting section. I also bought some trim (ric rack, sequins, and glitter glue) to make it fancy.

Here's how it turned out.


She's been playing with it nonstop since she got up from her nap. She has barely even looked at the real tree. I'd call that success!!

Note: I hung it on the wall using that gummy adhesive that teachers use to hang posters. It stuck to the wall, but it didn't stick to the felt. So I hot glued some green card stock to the back of the tree in various places (the top, the bottom, and several of the branches). That did the trick. The gummy adhesive is sticking great now.

Linked To:

Organizing Made Fun
Related Posts Plugin for WordPress, Blogger...