Showing posts with label Wreaths. Show all posts

Monday, March 11, 2013

Tutorial: Spring Wreath with Fabric Flowers


I made this wreath last week with the hope of bringing on some warmer weather. I also promised a tutorial. Without further ado... here it is!

You will need:

  • grapevine wreath
  • letter
  • twine
  • an assortment of fabric strips.  2" x 16" (for the small flowers and some of the inner petals on the medium flowers), 3" x 18" (for the medium petals), and 4" x 24" for the large flower. Mine weren't exact. Just close enough.
  • an assortment of buttons
  • hot glue/glue gun
  • floral wire
  • felt
First, I covered the letter with twine. I already had my letter. It was leftover from a monogram decoration from my baby shower. It doesn't matter that it had previously been painted purple, the twine covered it all up anyway.

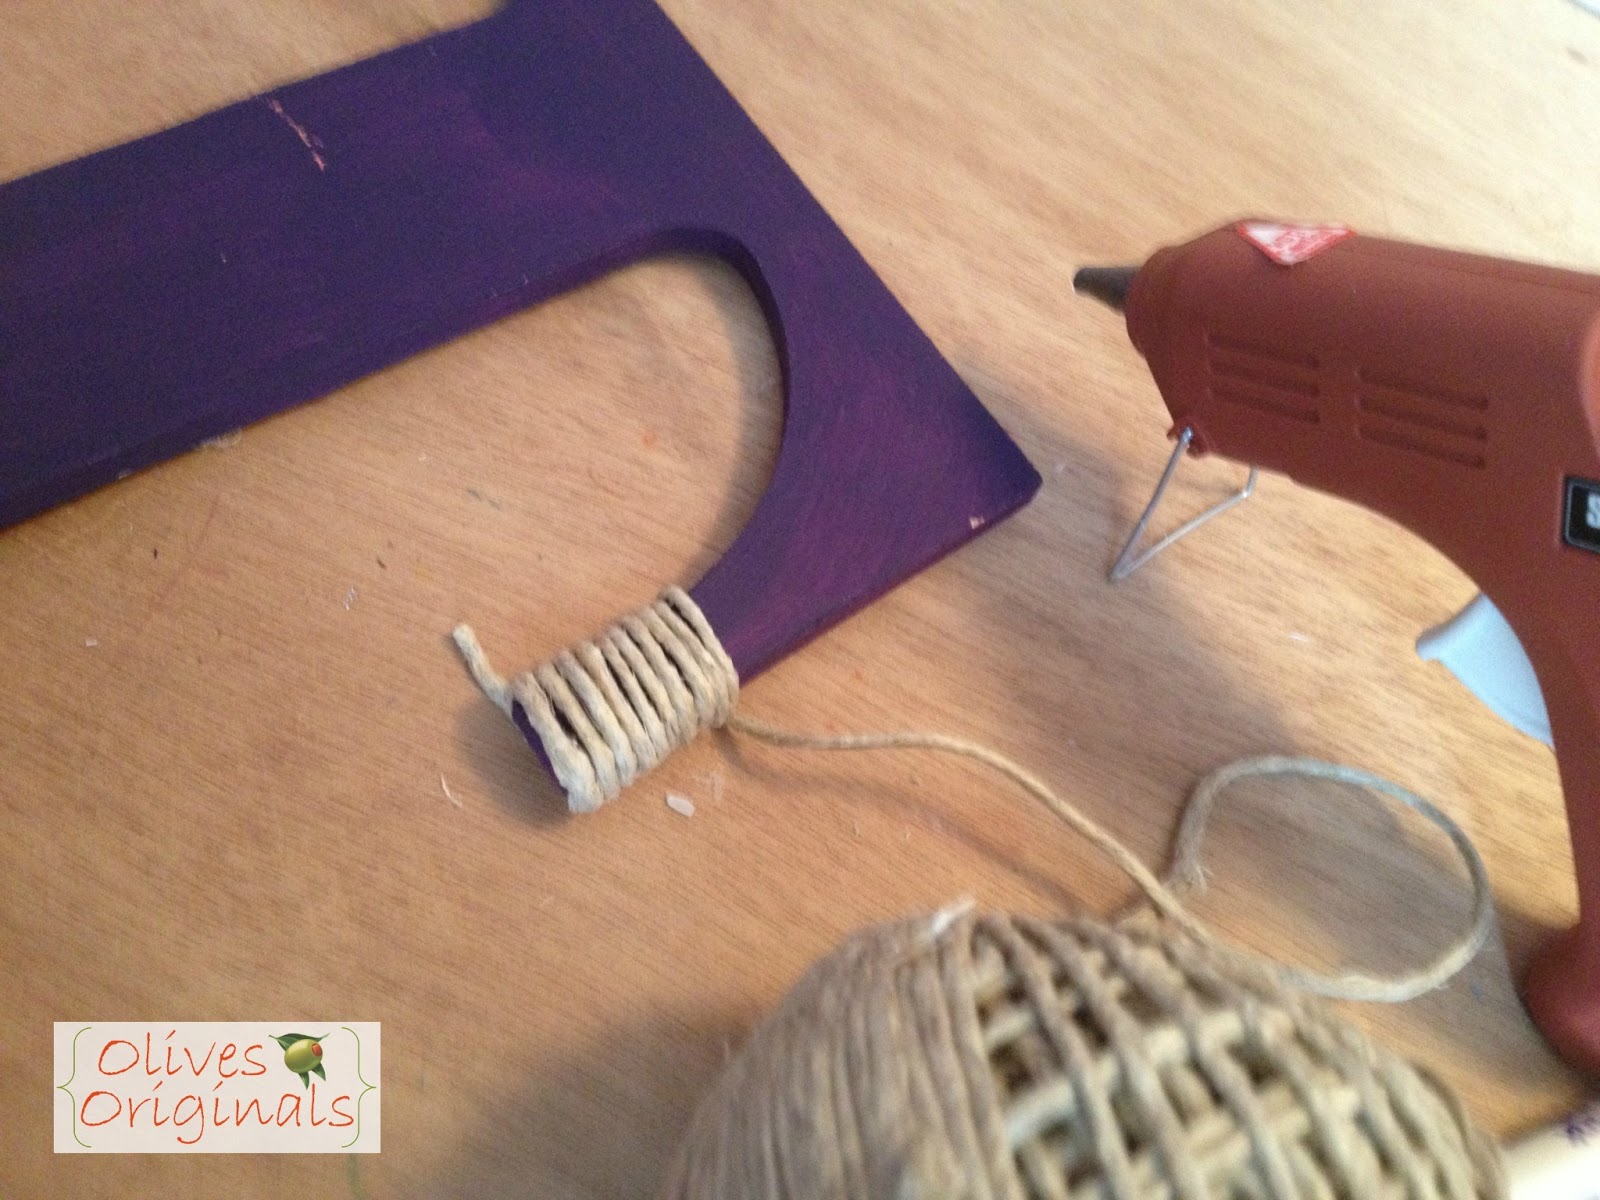
I put a dab of hot glue on the back of the letter and left a little tail to hold onto while it dried. Then I started wrapping.

And wrapping.

And gluing. About every few inches. Except when I got to the corner areas. See how it is curved on the bottom and straight on the top. That made it a bit tricky to wrap neatly without the twine slipping around. So I glued along both the curved and straight edges for each time I wrapped the twine.

I wrapped it all the way up to the corner. Then I glued it down on the back and trimmed the tails.

Then I wrapped (gluing almost the entire length of the curved and straight edges) the next section.

I repeated this process on the bottom of the letter as well. Then just wrapped up the middle. I didn't use much glue on the middle part. Maybe a drop every few inches.

After I finished the letter, I started cutting and assembling my fabric flowers. I used scraps leftover from quilts I have made, so the fabric didn't cost anything either! Love using up leftovers!

I cut out an assortment of squares from the fabric strips. The inner petals are 1/2" small than the outer petals. So if I cut 2" squares for the inner petals, I cut 2.5" squares for the outer petals. I also cut out 3" and 3.5" squares and 3.5" and 4" squares. Each set of petals takes between 6 and 8 petals (fabric squares) depending on how full you want it to be. I found 6 not to be enough.

I used the lid of a mason jar to trace my first set of circles (I flipped it over and traced the inner ring for the smaller circle). But I found freehand worked better because the flowers looked fluffier if the circles weren't perfect. However, if you're a perfectionist, trace away! You'll have to find something else to trace for the large and small flowers. This is the perfect size for the medium flower.


Once I finished cutting the circles, one at a time, I created the petals. First, fold one circle in half like a taco.

Then fan fold it. Bring one corner up the front and the other up the back.

This was really hard to get a picture of, but when it is finished it will look like a cone from the front. But from the top (where you would put the ice cream if it were really a cone) it looks like an S.


I put a very small dab of hot glue in the tip of the cone on each side to hold it in place. Repeat for each of the circles.

Now it's time to assemble the petals to make a flower. Cut out a piece of felt into a tiny circle. It needs to be big enough to glue the petals onto, but small enough that it doesn't show outside the edges of the flower.

Glue the outer petals on first, slightly overlapping them for fullness. Then glue on the inner petals.
 Finally glue a coordinating button in the middle.


After assembling all the flowers (it took a while!), play with the arrangement on the wreath. And don't forget to make a few flowers to put on the letter. Oh, and it's cute to mix it up by including some flowers that only have one row of petals.

Once you've found an arrangement you like, start gluing the flowers down. Attach the letter using floral wire. I also used hot glue for the letter anywhere it made direct contact with the wreath.

The wreath is the only part I had to buy for this project. With my 40% off coupon for Hobby Lobby, that makes the Grand Total: $3.60! Not bad!


Friday, March 8, 2013

Spring Wreath with Fabric Flowers


Spring is almost here! There's still quite a bit of snow on the ground here, but it's supposed to warm up this weekend. I wanted to help welcome Spring (and maybe convince it to come a little sooner) with a cute floral wreath for my front door.


I had everything except the wreath itself already on hand. With my 40% off coupon, the grand total for the project cost me $3.40! Stay tuned for a tutorial on Monday!

Thursday, November 29, 2012

Christmas Wreath


I took my sewing machine in for some maintenance this week. That means NO SEWING for a week and a half! What is a girl to do? Well, look at Pinterest of course and tackle some projects I'd been saving for later. I saw this wreath, and knew I had to make one like it for my door this Christmas. I made it today during Little O's nap time.

I bought most of my supplies at Hobby Lobby. Some of the ribbon is from last year in my stash, and the peppermint ornaments were donated by my mom (not sure where they came from).

First, I painted the letter white. After it dried I added the red and green dots using craft paint. When it was totally dry, I sprayed it with clear acrylic to keep it nice and make it a little bit glossy.

I made bows out of wired ribbon. I learned how to do this when I was a gift wrapper at a department store in grad school. I can't tell you how, but I could SHOW you... (note to self: create ribbon bow demo video).

I used floral wire to attach the bows and the ornaments to the wreath. And then I used hot glue to secure them and keep them from wiggling. I stuck the ornamental sprays in through the back of the wreath, and adjusted them until I liked how they looked. (They are on floral wire and are pretty flexible).

To attach the T to the other side of the wreath, I used floral wire and hot glue. First I put a dob of glue on the back of the top part of the T and pressed the wire into it. I held it until it dried. Most boring part of the whole project. Then I repeated that step on the back of the bottom of the T. I attached the wire to the wreath and secured the T to the wreath with hot glue anywhere it was touching.

I'm really pleased with how it turned out. And now I have all these visions in my head of creating wreaths for EVERY holiday. Who knew making a wreath could be so much fun!

I was featured!:


Linked To:

Organizing Made Fun
Related Posts Plugin for WordPress, Blogger...